This resource aims to show the step to implement various services using AWS ECS + Fargate, using deploy via (bitbucket) pipelines and Docker.
Let's say you have several backend applications in your project and you need to deploy them to some AWS service. And, in the case of multiple services, the ideal would be to use a quality service, scalable and with a low cost.
We could use EKS (Elastic Kubernetes Service), however, it is a bit expensive and maintenance is expensive. So, we have the AWS service that works with containers, which is the ECS (Elastic Container Service). In addition to using ECS, we will use only 1 ALB (Application Load Balancer) for all applications.
| Amazon Elastic Container Service (Amazon ECS) is a fast, highly scalable container management service that makes it easy to run, stop, and manage containers on a cluster. Containers are defined in a task definition that you use to run individual tasks or tasks within a service. In this context, a service is a configuration that allows you to simultaneously run and maintain a specified number of tasks on a cluster. You can run tasks and services on a serverless infrastructure managed by AWS Fargate. Alternatively, for more control over your infrastructure, you can run tasks and services on a cluster of Amazon EC2 instances that you manage.
| Amazon ECS lets you start and stop your container-based applications using simple API calls. You can also retrieve cluster state from a centralized service and gain access to many popular Amazon EC2 resources.
AWS made Fargate available as an alternative in its ECS service, at the end of 2017. One of the most important factors that catches Fargate's attention is how it works with containers, it doesn't treat it as an infrastructure, but as a service, or CaaS (Container as a Service).
Fargate, nothing more, takes care of all the necessary infrastructure for our containers. We just need to configure each container to know how much CPU processing it will require and how much memory it will consume, and Fargate takes care of the rest. From the availability of our container, guaranteeing scalability, and most importantly, it will charge only as long as it is used.
In a nutshell, we will launch our containers and leave the rest to AWS!
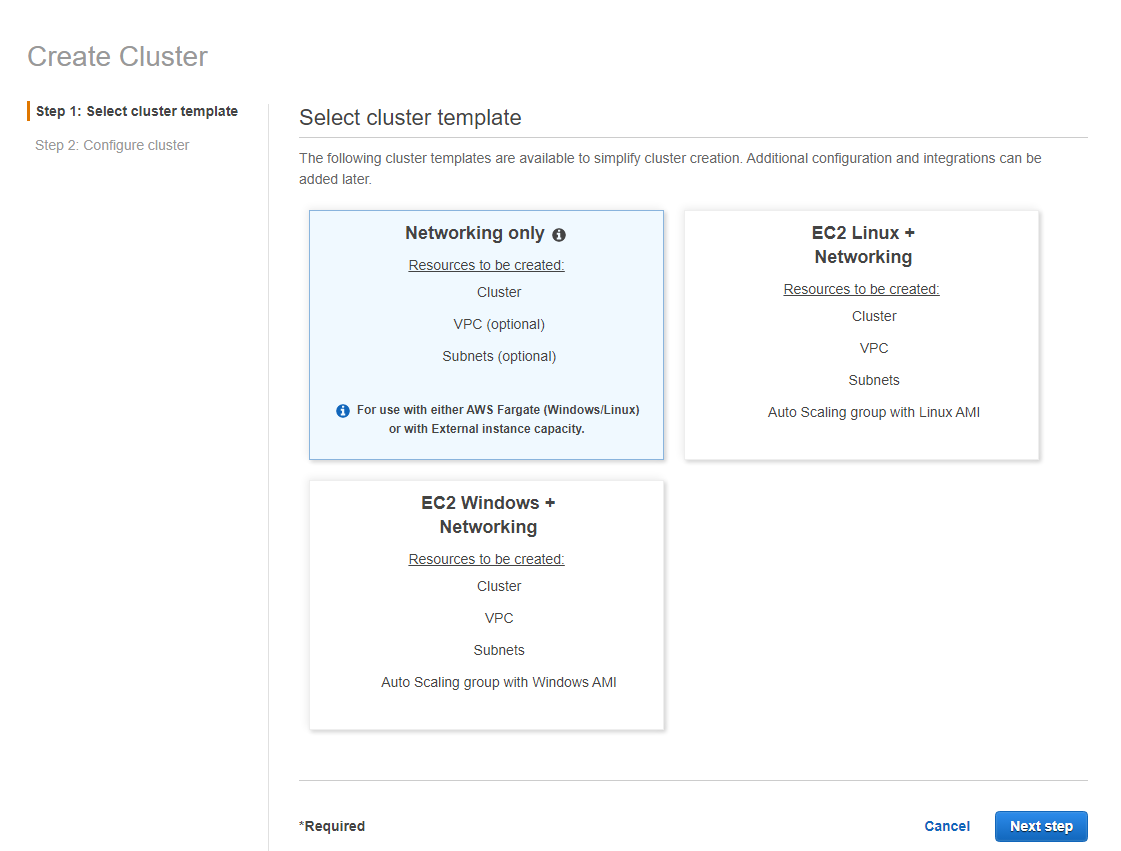
First of all, within the AWS console, go to the Elastic Container Service >> Cluster >> Create Cluster. Pay attention only to the region where you are creating this cluster, as we will use this information in the next steps.
When creating an ECS Cluster, we have 3 template options. We chose Networking only as we will only need it to access the available VPC to connect to its subnets and find the containers and other configurations. And then be accessible via a subdomain. Also, only in this mode can we use Fargate.
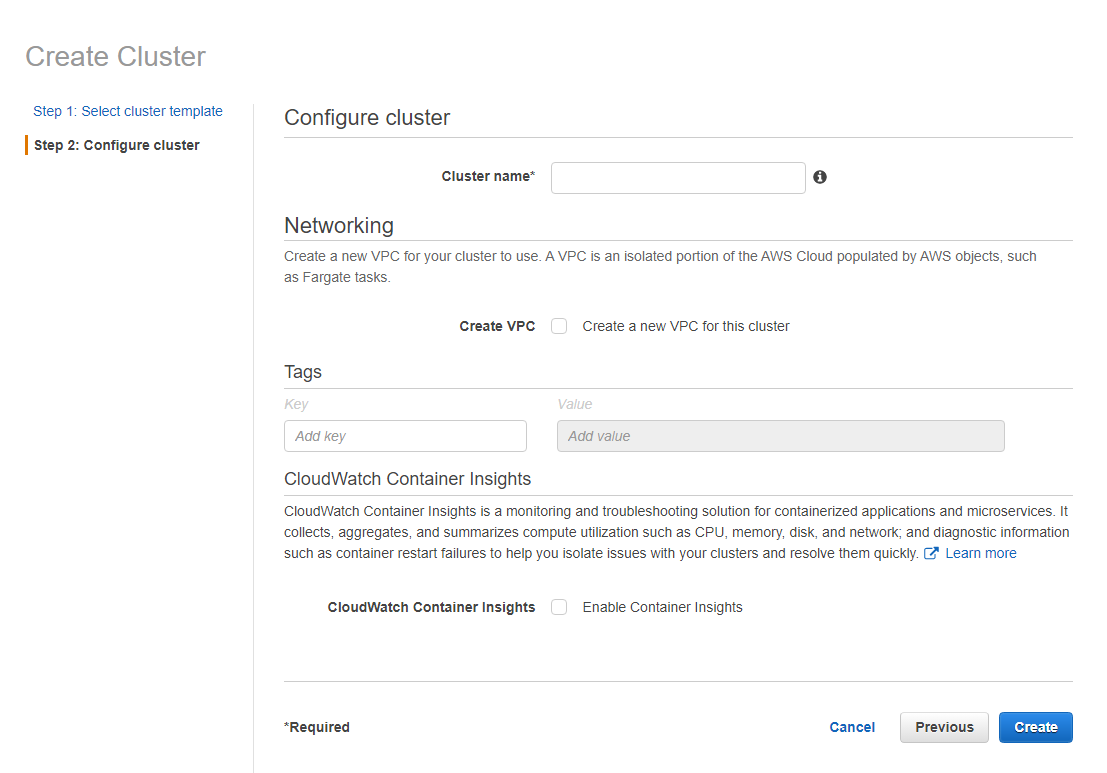
Here we give the name of our cluster. If you already have a VPC and its subnets, under Networking you do not need to select to create a new VPC. I recommend creating a new VPC and subnets exclusively for this cluster.
After we create our cluster in ECS, access the EC2 service and go to Network & Security >> Security groups >> Create security groups.
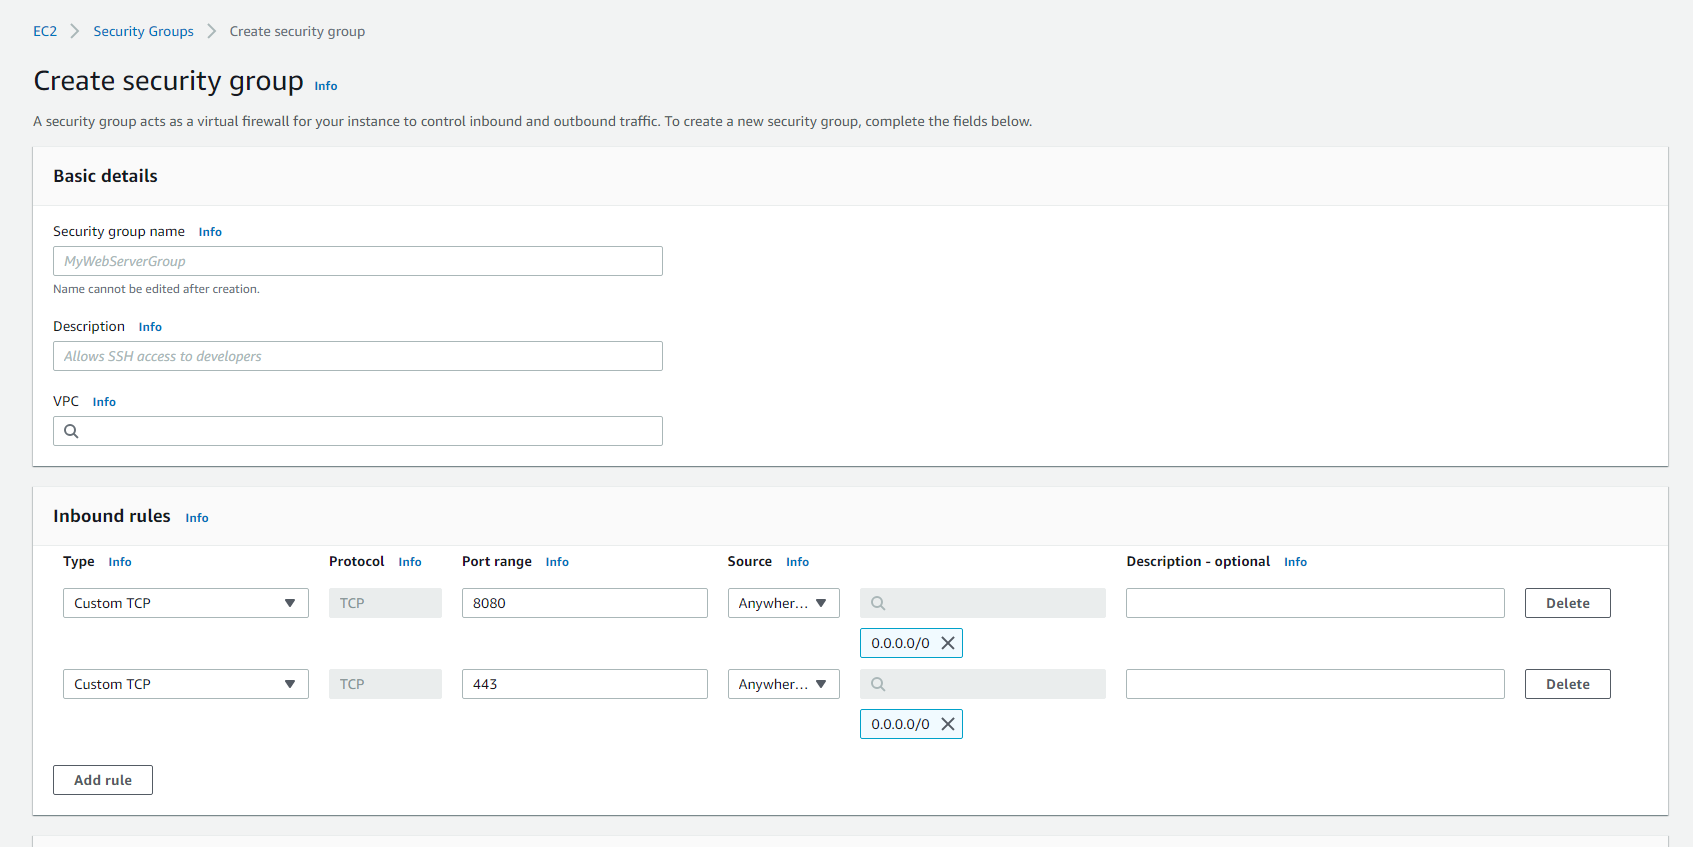
Here we will add the security rules that we will associate in our ALB in the future. Also, we will put the rules of the doors that we will act.
In the screen above, just name the Security group, select the VPC created and the subnets created previously.
In Inbound rules, we can add our ports. In our case, all our application containers have port 8080 for HTTP and 443 for HTTPS. Just configure as in the image above.
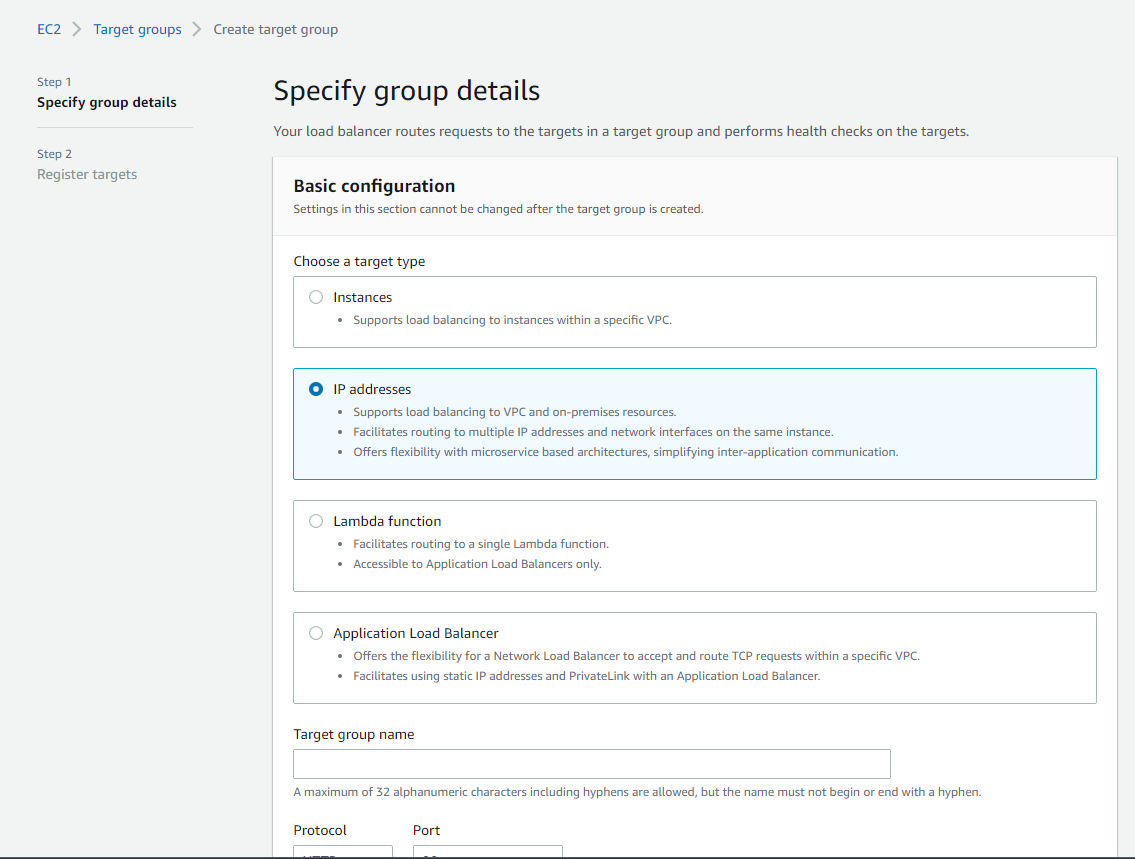
After we have the security group, still inside EC2, go to Load Balancing >> Target groups >> Create target group.
We will pay more attention here, as we will have several target groups, one for each application.
Our target group will be of the IP addresses type, as the IP of each task definition that will leave each application standing will have a public and private IP and will be associated here and in our ALB, in the next steps.
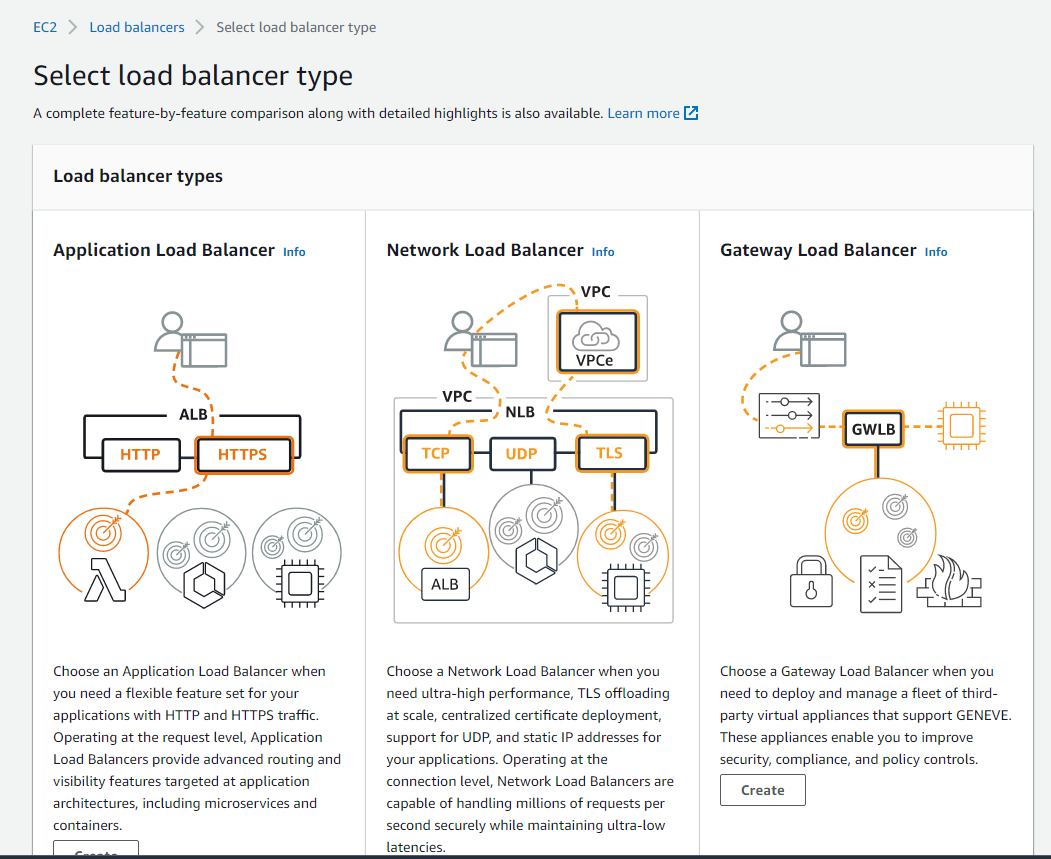
So, let's create our load balancer. AWS offers us 3 types of load balancer, and since we want to access our applications from external addresses, it needs to be an ALB type.
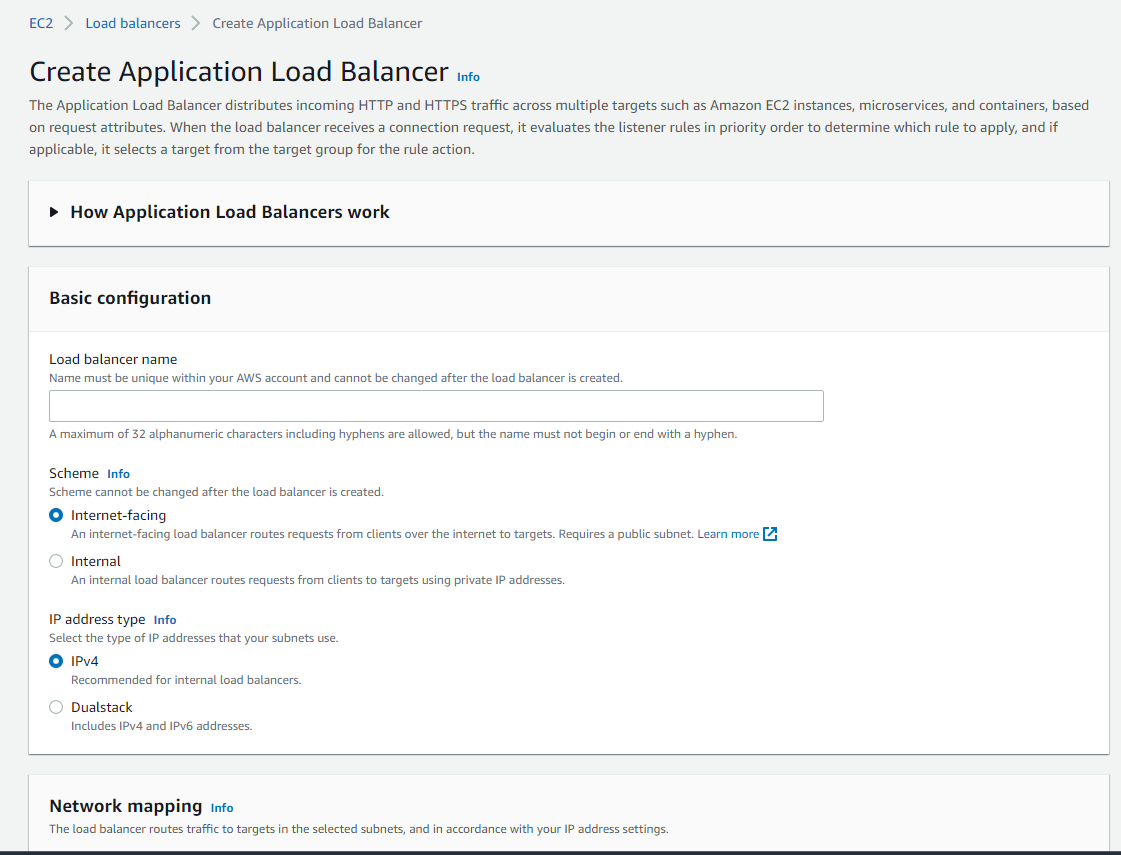
Here, we name our ALB. we selected the Internet-facing scheme and the IP address type IPv4.
In Security groups we just select what we created in step 3.
In Listeners and routing is where we tell our ALB which target group it is going to target.
Here we select our HTTPS certificate. In my particular case, the certificate and domain are already all configured within AWS and Cloudfare.
After that, just click Create and wait a few minutes for the ALB to be created.
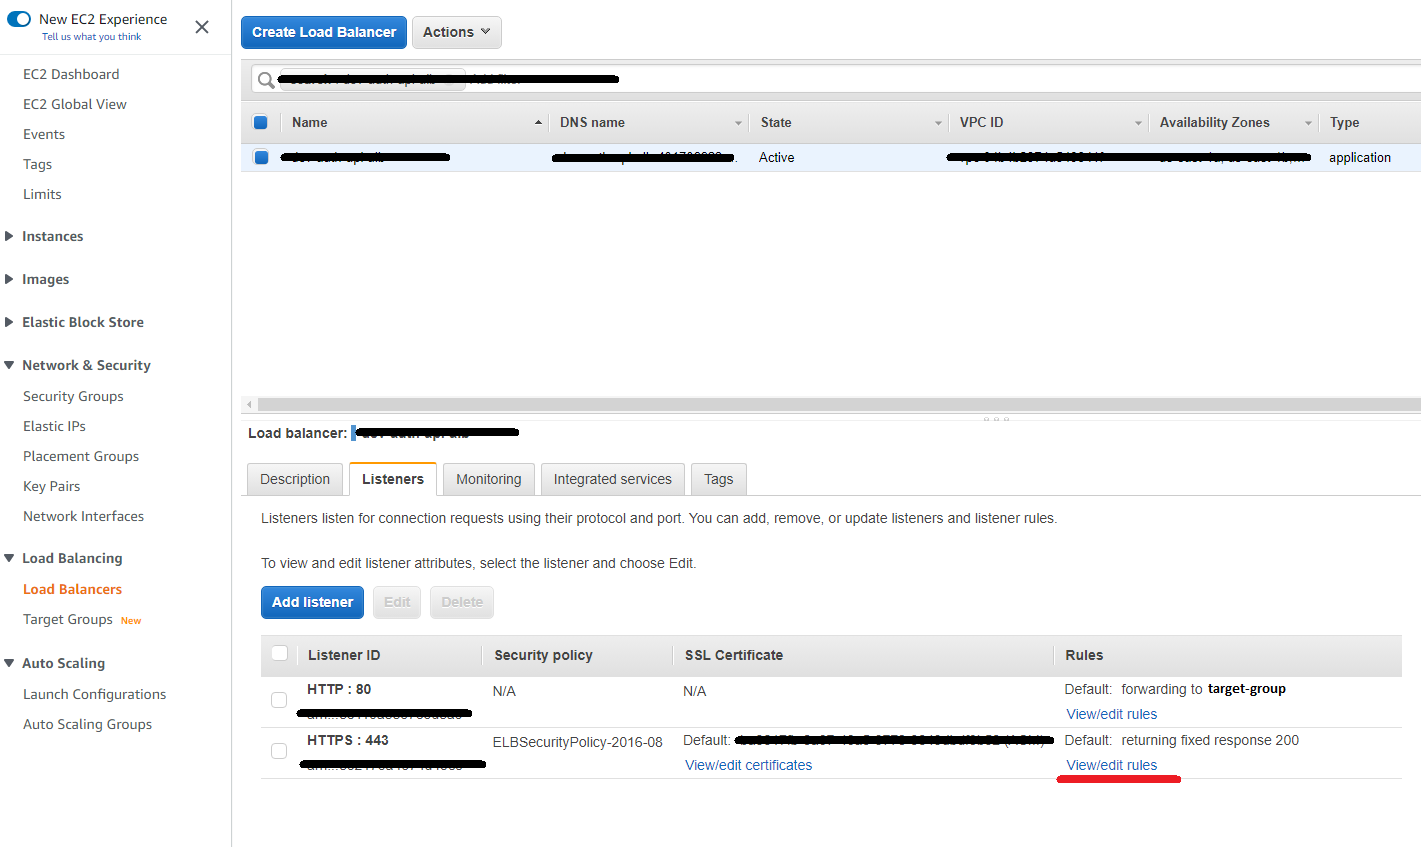
After you have finished creating the ALB, select it and click on the Listeners tab. Here we have the rules for our port 80 and 443.
As we will access via HTTP, all the rules that we will need to edit are on port 443.
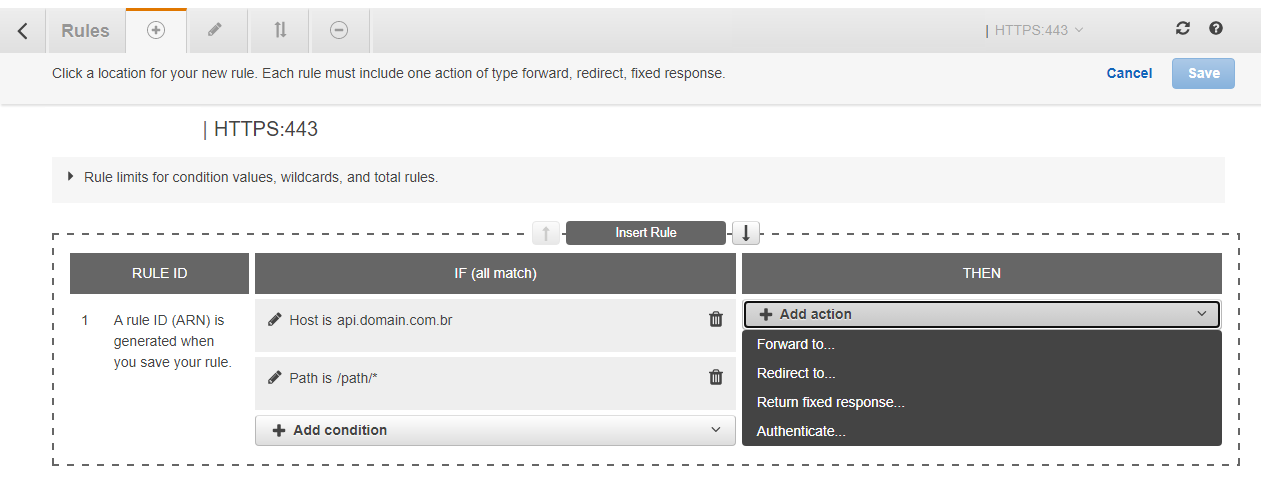
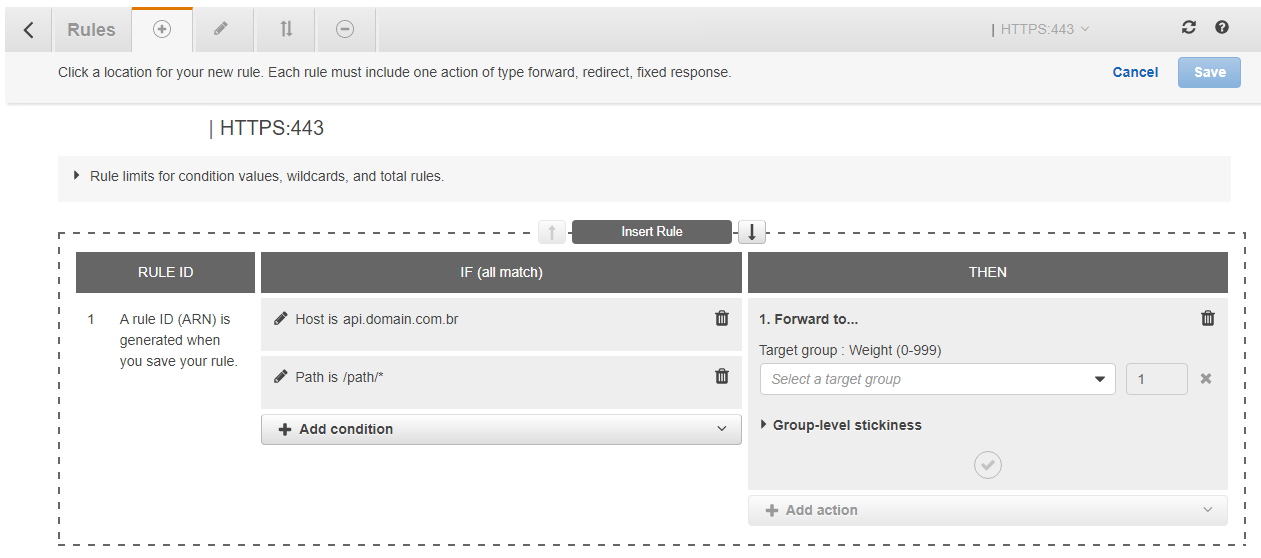
And, in this step, we will add each path for each application that we have available and direct them to their respective target group.
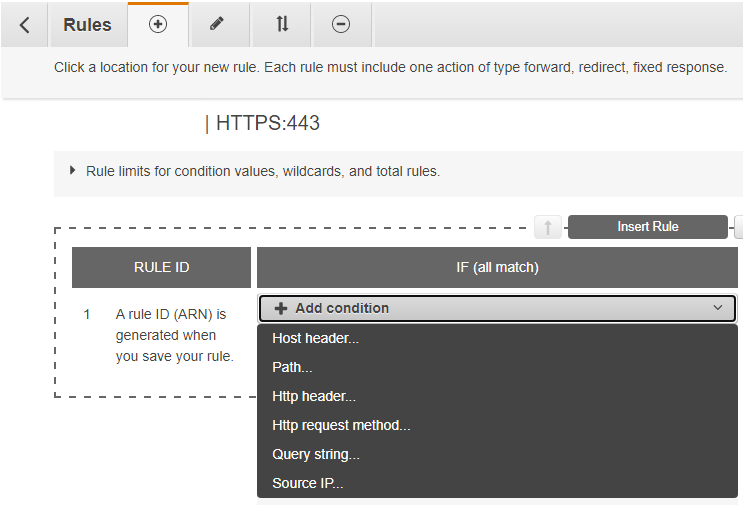
In the IF (all match) column, we will always have two conditions for each application.
The first condition is our Host header which is the domain of our application.
The second condition is the prefix of our application. For example, if we have api.domain.com.br as domain and two APIs, auth and users, then we will have two rules, one for auth and one for users.
Then, still in the same rule, we added a new condition of type Path putting /auth* or the prefix of your application.
In the Then column, it will be the action of this rule that we are implementing, that is, which is the target group responsible for this rule. Click on Forward to.. and select the target group for this application. So just save this rule.
For each target group and application that we will have, it is here that we will insert a new rule to access correctly through our domain.
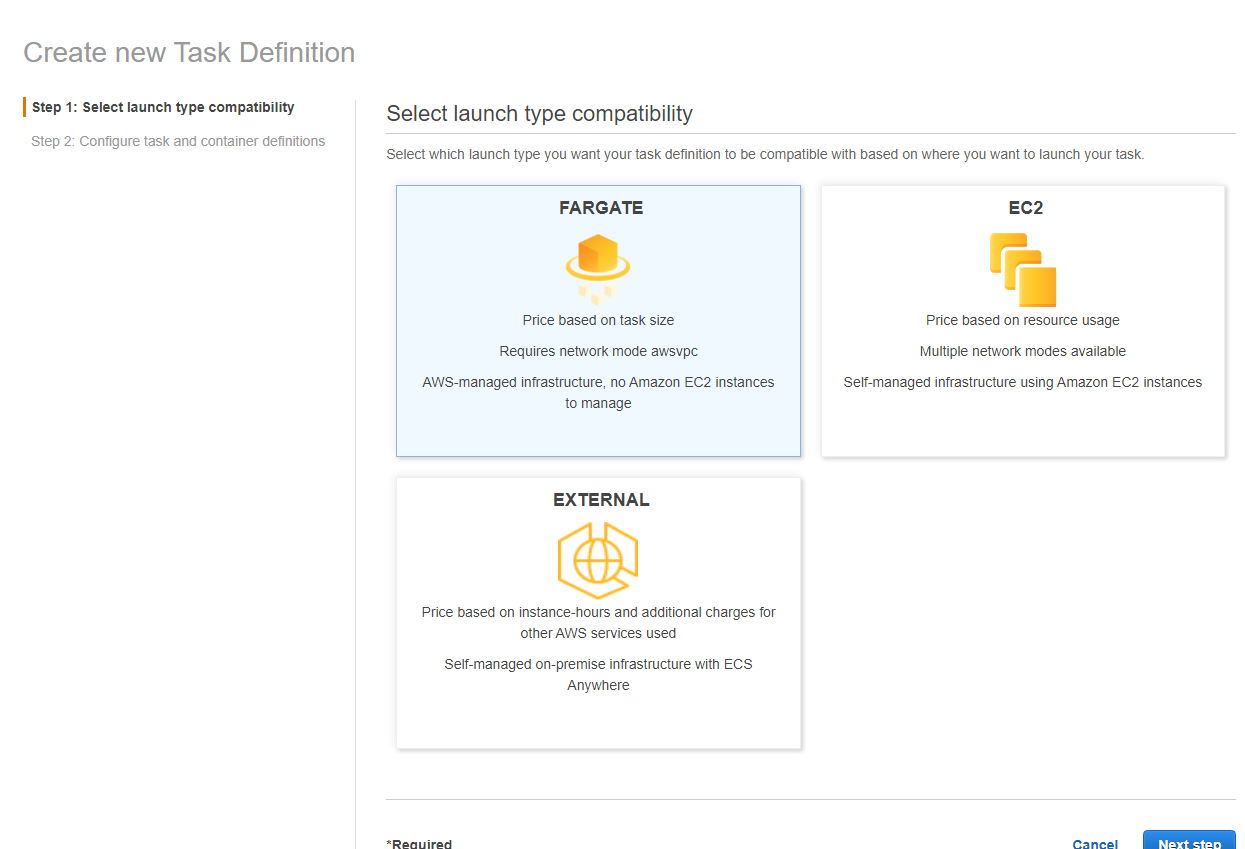
After we have the cluster, ALB, target and security groups all configured, we need to configure our tasks that will be our standing applications and their respective services. Go to ECS >> Task definitions >> Create new task definition.
Remembering that each application needs to have a Task Definition.
In this first step is where we will select if we are going to use Fargate or EC2 or something external for our task. Select Fargate and click Next step.
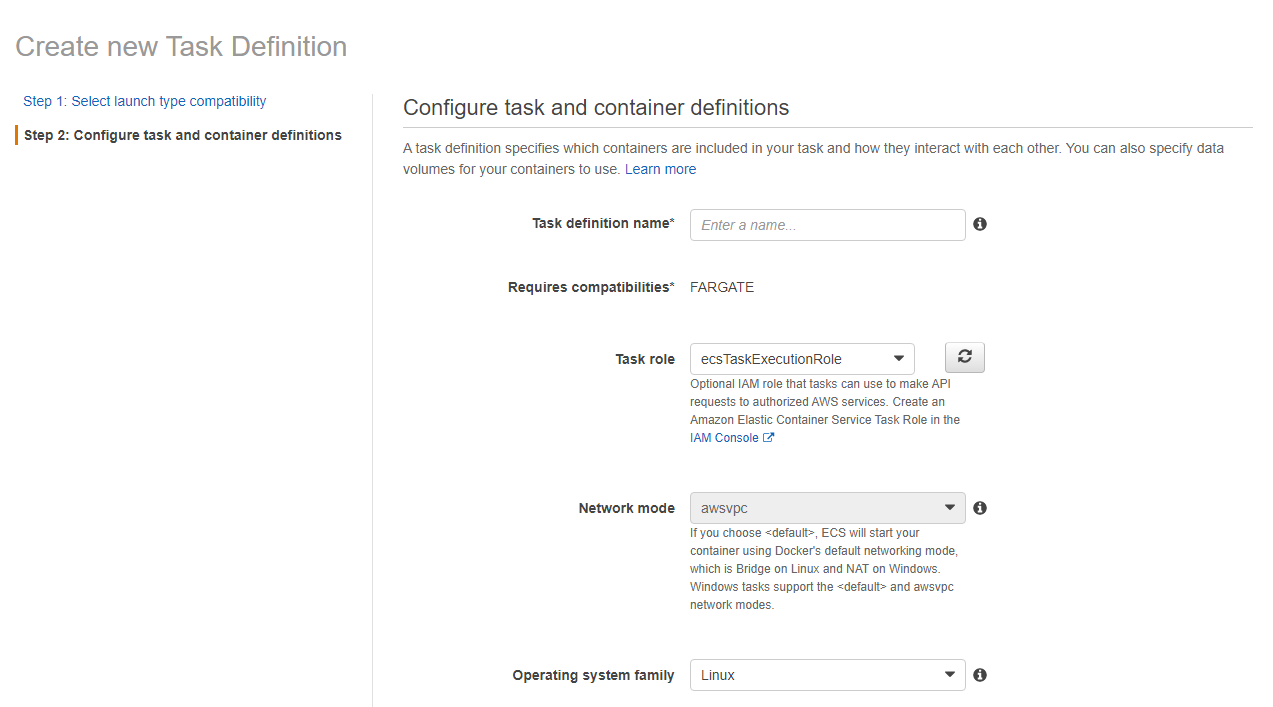
Here, name the task definition, select a Task role according to the print example and the Linux operating system. There are options to use Windows as well, but the cost will be higher.
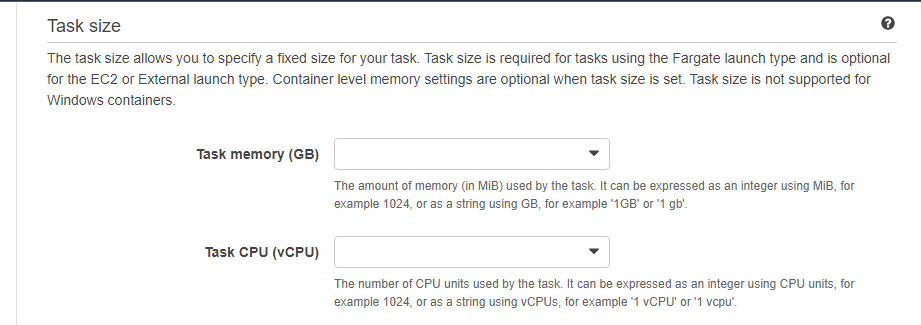
In Task size is where you will say how much processing it will require CPU and how much memory will be consumed.
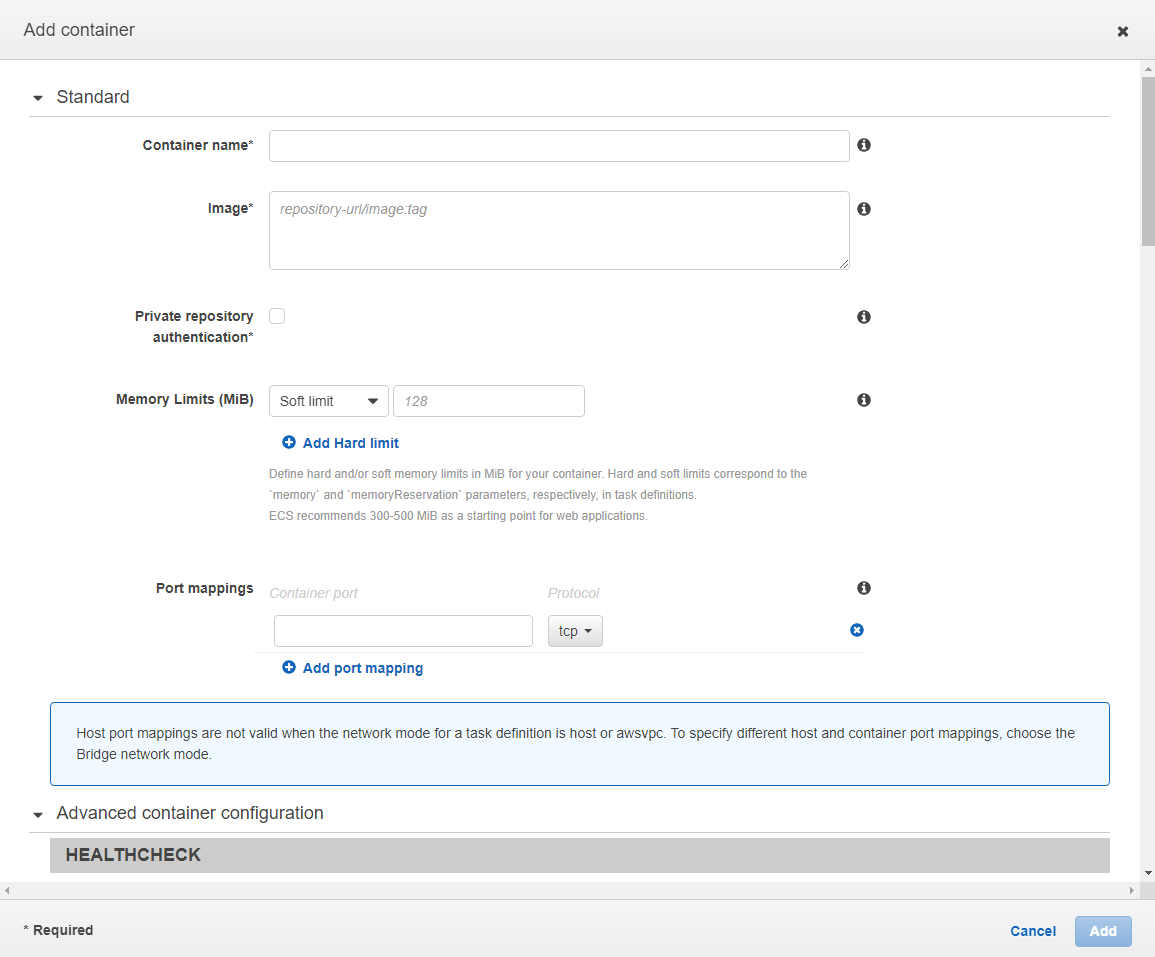
In Container definitions is where we will configure our Docker container, environments and logs configuration. Click on Add container. In the modal that opens, just name the container, and in Image you will add the address of your Docker image. In Port mappings just put 8080.
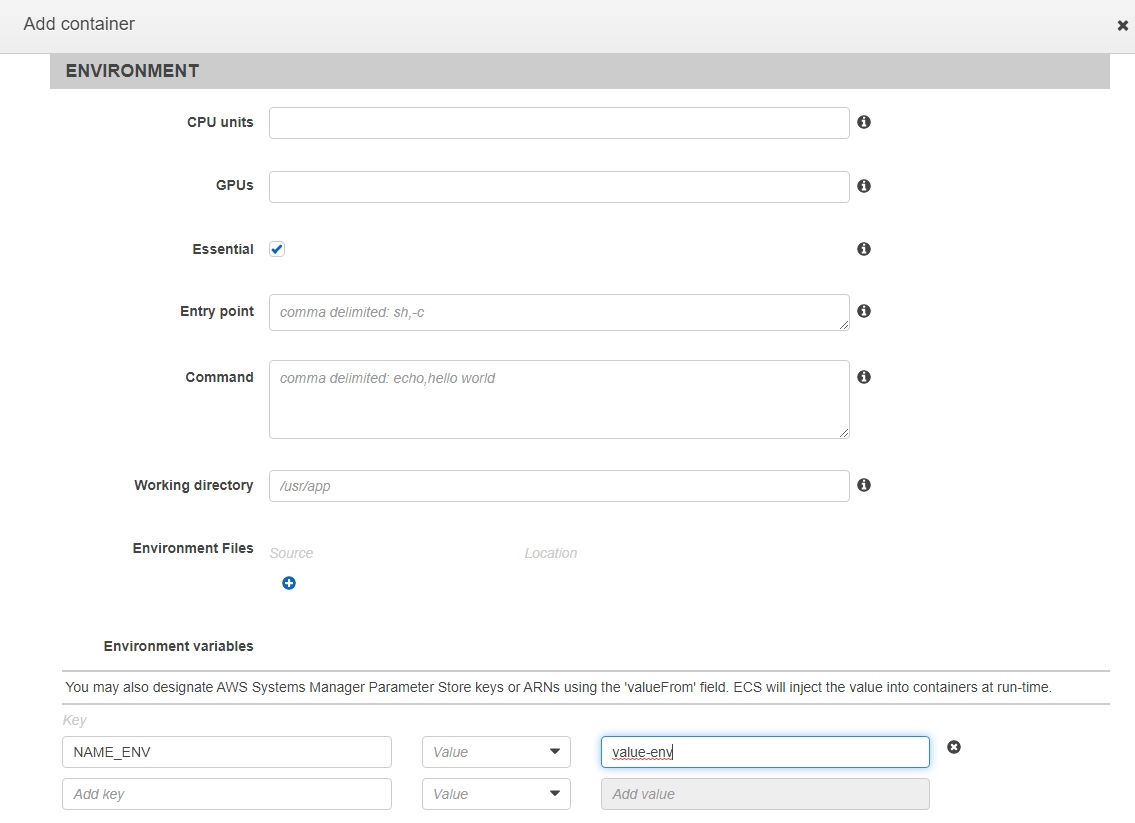
In the Environment section we will add our application variables.
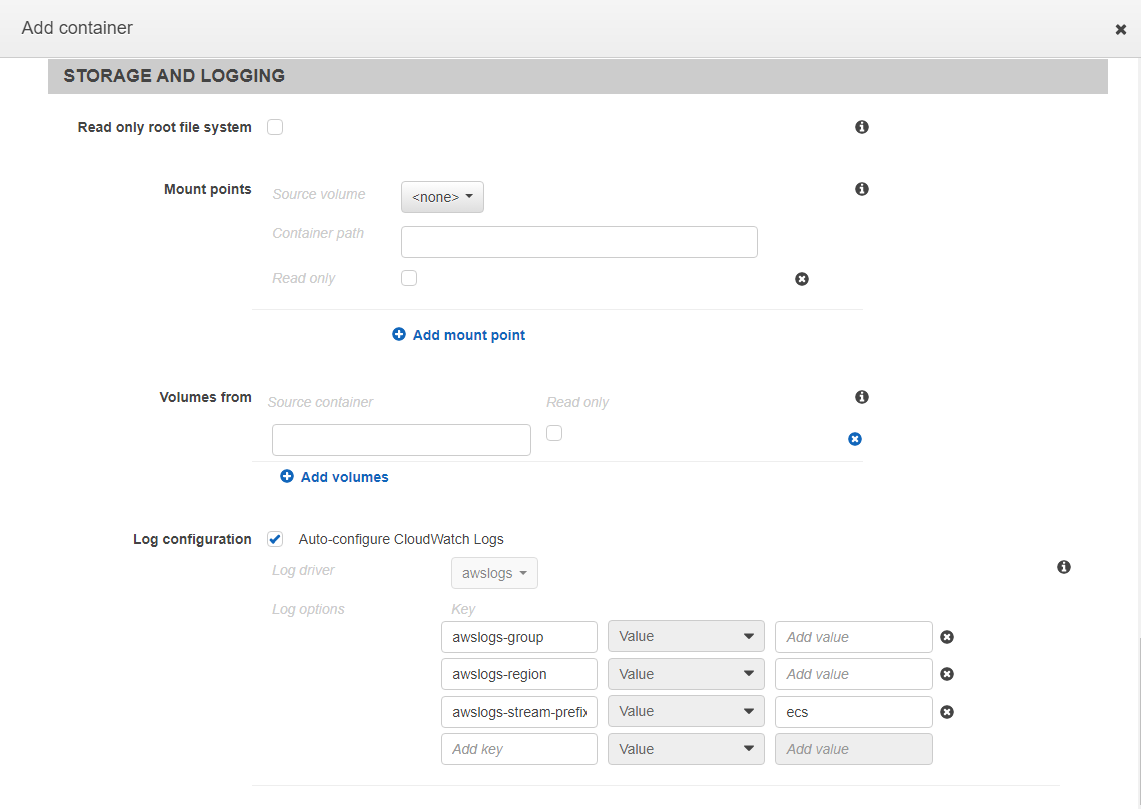
In the Storage and Logging session, just select the Log configuration checkbox to have all the logs of our application available, being possible to view them via CloudWatch.
Remembering that each application needs to have a Service.
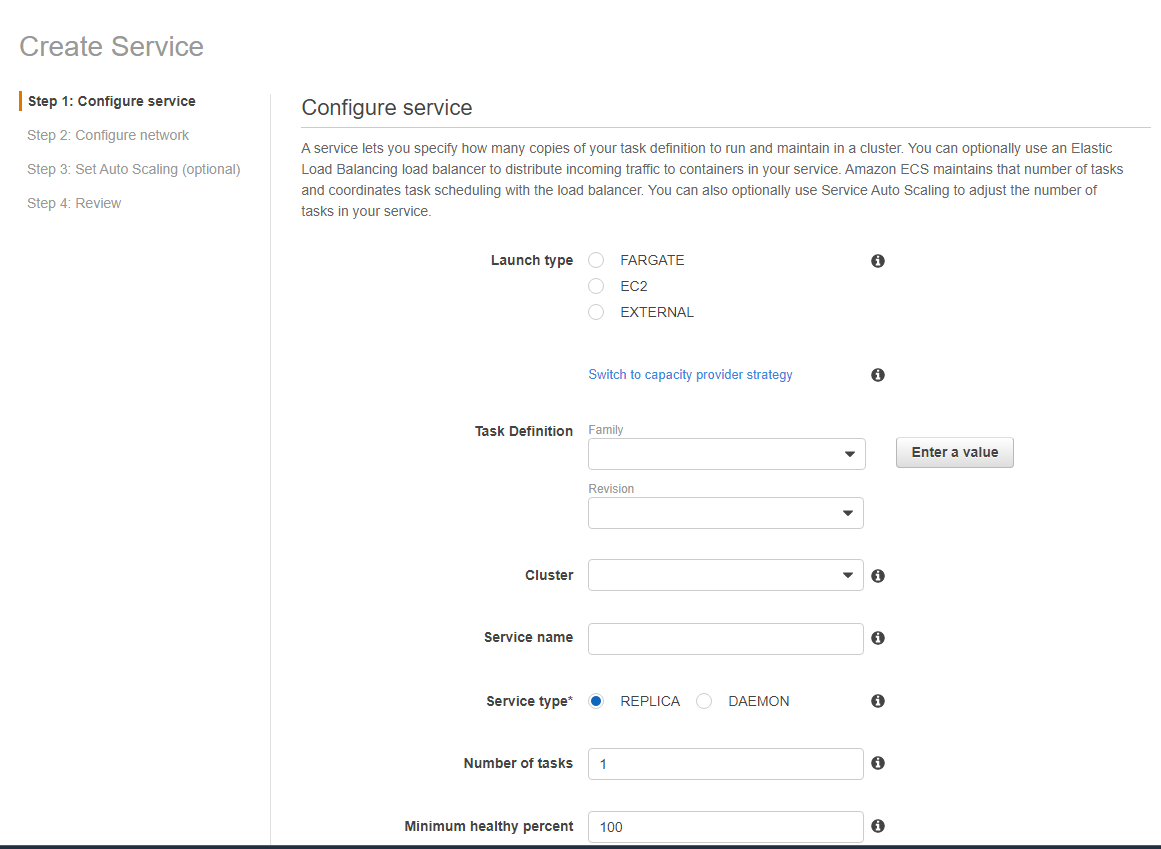
In the first step, we will select some settings for our service.
In Launch type just select the type of your task definition, because we will link it here, in the next steps. In our case, we selected Fargate.
In the Task definition block, in Family we will select our task definition for this service. We will also select the cluster, name the service and set Number of tasks to 1. Because we will only need 1 task running for each service, we don't need more than 1.
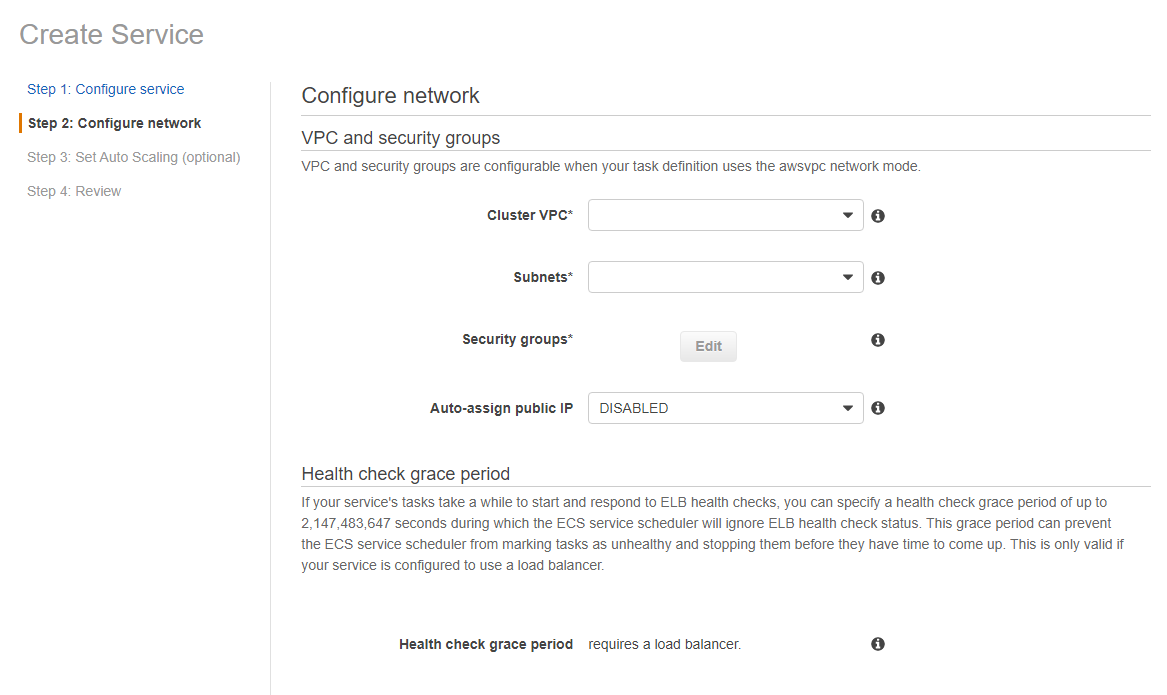
In the next step, under Configure network, we will select the VPC and subnets created earlier.
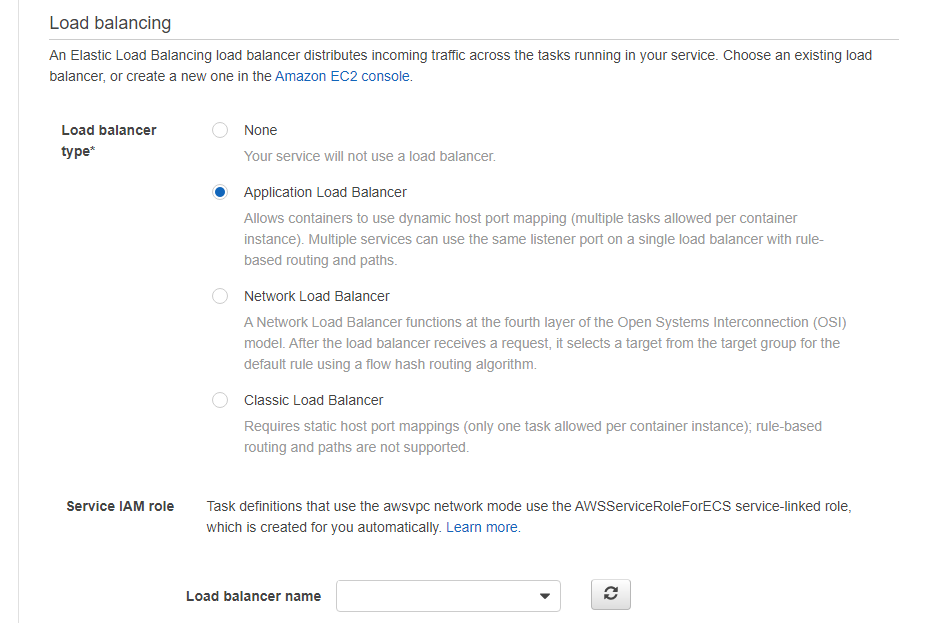
Also, we will select the created ALB. In Load balancing >> Load balancer type we select Application Load Balancer and in the select that appears, we select the ALB created previously.
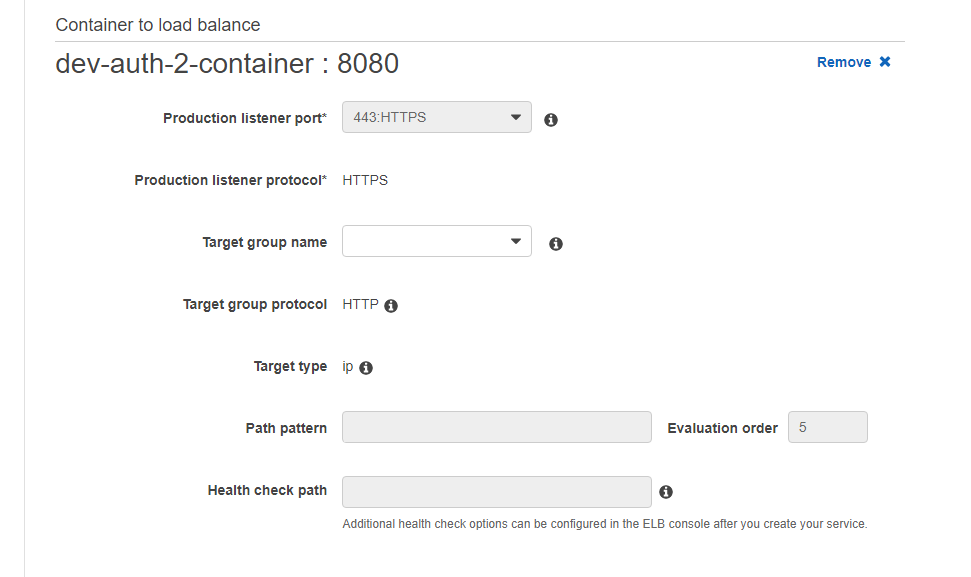
In Container to load balancer we will link the container to our ALB, clicking on Add to load balancer.
Just select the Target group and it fills in the rest of the fields.
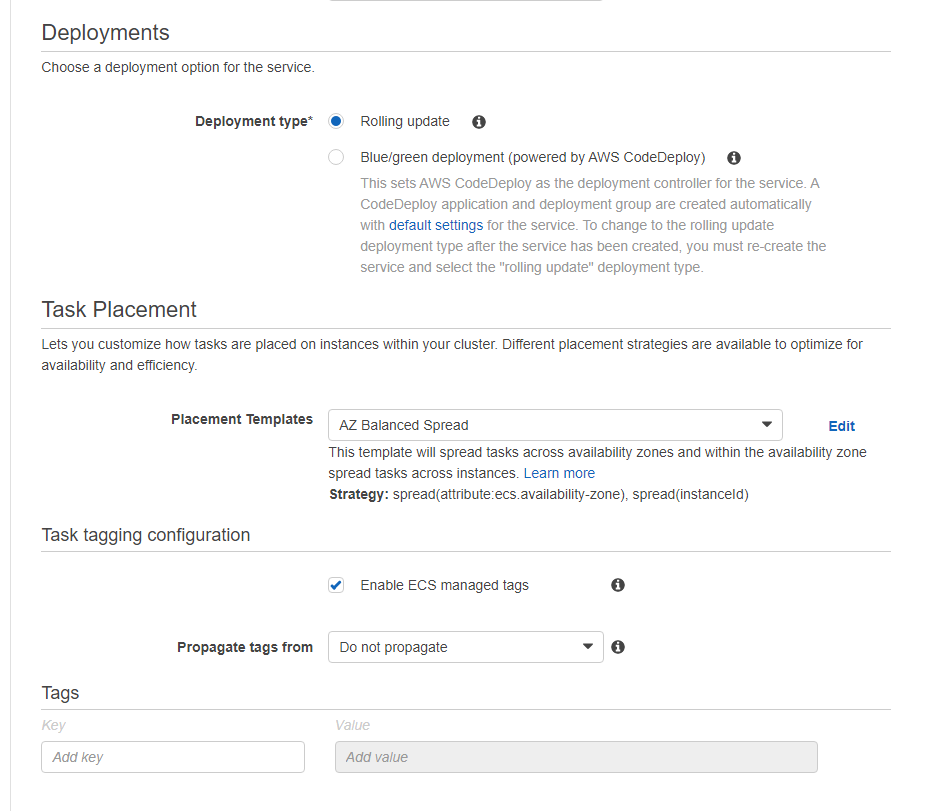
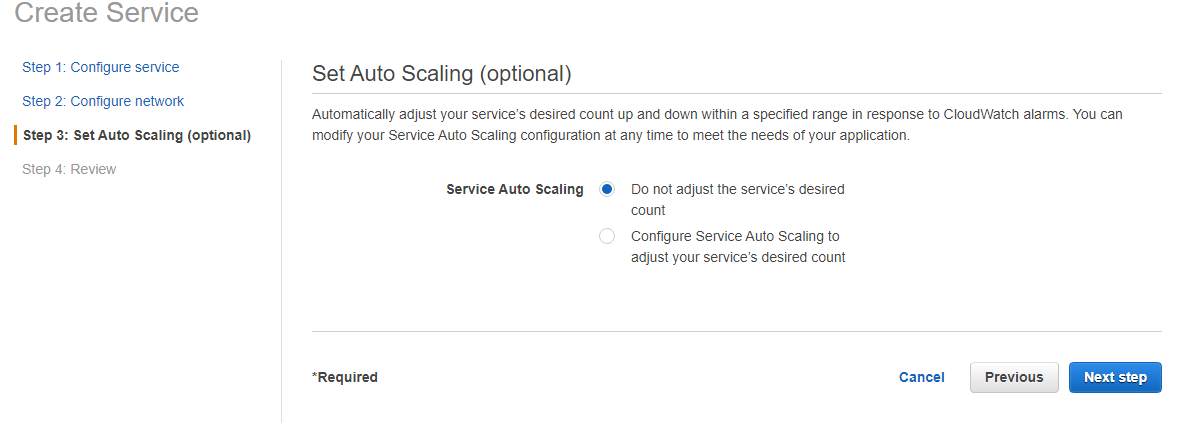
In the last step, we say whether we want this task to be auto-scalable or not. And then we see the review and create our service.
Remembering that you must repeat the creation of each service for each application.
That done, we have our application configure using ECS + Fargate.
To deploy our applications via pipeline, and update the task definition with a new version of our container, we need to have some commands in the pipeline, in addition to the task-definition.json file that contains our task definition data, which we will update with each auto-deploy.
The task-definition.json file that contains our task definition data:
{
  "family": "api-ecs-task-definition",
  "networkMode": "awsvpc",
  "executionRoleArn": "ecsTaskExecutionRole",
  "containerDefinitions": [
    {
      "image": "123456789008.ecr.azonaws.com/api:$BITBUCKET_COMMIT",
      "name": "api-ecs-container",
      "portMappings": [
        {
          "hostPort": 8080,
          "protocol": "tcp",
          "containerPort": 8080
        }
      ],
      "logConfiguration": {
        "logDriver": "awslogs",
        "options": {
          "awslogs-group": "/ecs/api-ecs-task-definition",
          "awslogs-region": "us-east-2",
          "awslogs-stream-prefix": "ecs"
        }
      },
      "essential": true,
      "environment": [
        {
          "name": "NODE_ENV",
          "value": "developement"
        },
        {
          "name": "PORT",
          "value": "8080"
        }
      ]
    }
  ],
  "requiresCompatibilities": [
    "EC2",
    "FARGATE"
  ],
  "cpu": "512",
  "memory": "1024"
}
In the pipeline, we have the following snippet of scripts:
script:
# AWS Login
- aws configure set aws_access_key_id $AWS_ACCESS_KEY
- aws configure set aws_secret_access_key $AWS_SECRET_KEY
- aws ecr get-login-password --region $AWS_REGION | docker login --username AWS --password-stdin $AWS_DOCKER_IMAGE_NAME

# Docker Build
- docker build -t api:${BITBUCKET_COMMIT} .
- docker tag api:${BITBUCKET_COMMIT} $AWS_DOCKER_IMAGE_NAME:${BITBUCKET_COMMIT}
- docker push $AWS_DOCKER_IMAGE_NAME:${BITBUCKET_COMMIT}

# Replace the container name in the task definition with the new image.
- yum install gettext -y
- yum update -y
- yum install jq -y
- export IMAGE_NAME="$AWS_DOCKER_IMAGE_NAME:${BITBUCKET_COMMIT}"
- envsubst < task-definition.json > task-definition-envsubst.json

# Delete current tasks running in service
- >
  export CURRENT_TASK_RUNNING_IN_SERVICE="$(aws ecs list-tasks --cluster $AWS_ECS_CLUSTER_NAME_DEV --service $AWS_ECS_SERVICE_NAME_DEV | jq -M -r '.taskArns | .[0]')"
- echo $CURRENT_TASK_RUNNING_IN_SERVICE
- aws ecs stop-task --cluster $AWS_ECS_CLUSTER_NAME_DEV --task $CURRENT_TASK_RUNNING_IN_SERVICE

# Delete task definition latest version
- >
  export CURRENT_TASK_DEFINITON="$(aws ecs list-task-definitions --region $AWS_REGION | jq -M -r '.taskDefinitionArns | .[0]')"
- echo $CURRENT_TASK_DEFINITON
- aws ecs deregister-task-definition --task-definition $CURRENT_TASK_DEFINITON

# Update the task definition and capture the latest revision.
- >
  export UPDATED_TASK_DEFINITION="$(aws ecs register-task-definition --cli-input-json file://task-definition-envsubst.json | jq '.taskDefinition.taskDefinitionArn' --raw-output)"

# Update the service
- echo $UPDATED_TASK_DEFINITION
- aws ecs update-service --service $AWS_ECS_SERVICE_NAME_DEV --cluster $AWS_ECS_CLUSTER_NAME_DEV --task-definition ${UPDATED_TASK_DEFINITION}
The example above only has the pipeline script snippets, where I use an image with CentOS, hence the yum commands. But, regardless of the operating system, note that we use the AWS CLI to connect to our AWS account and perform the desired operations, which is to update the task definition and perform a new deployment in our service. And on every request to update the task definition, it deletes the old task definition.
With that, we have the complete infrastructure: multiple services using AWS ECS + Fargate with Deploy via pipeline
