-
Notifications
You must be signed in to change notification settings - Fork 3
Package and Deploy
All information is available in VSCode documentation: https://code.visualstudio.com/api/working-with-extensions/publishing-extension
To generate a package with the current version of the project, you have to run the next command on project root folder:
yarn packageThis will generate a wollok-lsp-ide-x.y.z.vsix file on the same folder.
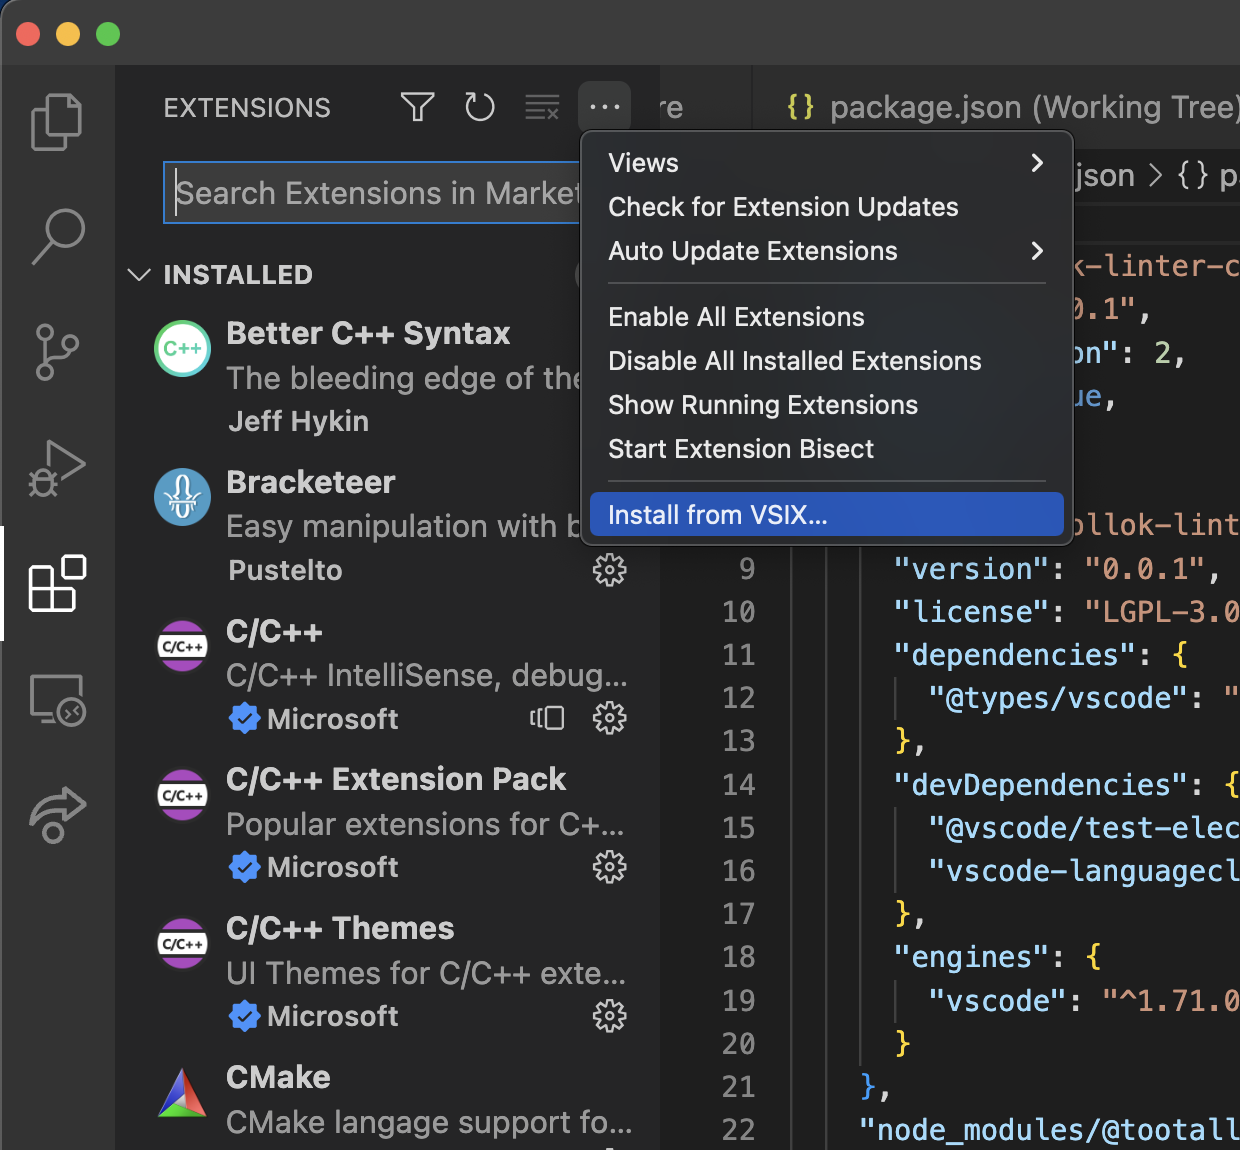
Then you can load the extension in any VSCode from that file:
- Go to Extensions tab
- Press settings button
- "Install from VSIX..."
- Search generated file and voilà

Wollok LSP should be running in your VSCode, open a Wollok file and test it!
- You need to change the version in
package.json - You need to add changes for the new version in
CHANGELOG.md - Emojis are useful to give a quick insight on what's accomplish: you can use VSCode extension :emoji: or https://emojidb.org/coverage-emojis
- Go to releases page in Github for this repository.
- Select the
Draftrelease and edit it

Configure it:
- Edit the custom tag, name it
vX.Y.Zwhere X.Y.Z represent major.minor.patch part of the version. For example:0.1.0> Create tag on publish - Name the release X.Y.Z (same convention as before)

- In the description, you should put 1. Wollok TS version and udpate/sanitize the 2. Change log
- Keep
Set as a pre-releaseunchecked - Keep
Set as the latest releasechecked - Once you finished, click on the
Update releasebutton
In your local environment, open a new Terminal (Git Bash/Bash/zsh) and run:
./scripts/publish.sh x.y.zwhere x.y.z must match the current version.
It will
- check for existing x.y.z version in releases tag
- check that
package.jsonversion should match the version you want to publish - and check the version is in the
CHANGELOG.mdfile - you must enter the Personal Access Token (PAT) in Azure.
If you need to bypass any of these validations, edit
publish.shbut bear in mind they avoid common mistakes we do while publishing releases.
Make sure you have an Azure account on behalf of Uqbar publisher. As a pre-requisite, you must have a token (if you don´t remember it, you can regenerate it). You may need a previous vsce login uqbar command (if vsce is not recognized you can install it via yarn install in the root folder, you'll be asked for the PAT).
If you enter Azure DevOps page you can regenerate the Personal Access Token for Uqbar. Once you generate the token, copy and save it safely because you will no longer able to see it.

Download VSIX file from the releases page. Go to this URL (if you don't have access, ask dodain or elRasta). For the first time,
- you should click on
New extension - select Visual Studio Code
- attach VSIX file
- click on Upload

If you want to publish a new version of an existing extension,
- click on
...at the right of the extension opening a contextual menu - then click on
Update, - attach VSIX file
- click on Upload

We also deploy our .vsix file in https://open-vsx.org/extension/uqbar/wollok-lsp-ide
In order to update the file, you can go to uqbar namespace in open-vsx. Follow instructions in this page.